Quick & Easy Bike Set-up
Quick and Easy Bike Set-up
For the Canberra recreational rider that is not serious about cycling here are some quick and easy bike set-up tips.
Cleat Position: Make sure you ball of your foot is centred over the pedal axle.
Saddle Tilt: Your saddle should generally be level
Saddle Height: There are many methods and formulas for evaluating the ideal seat height position during cycling. These set formulas are limited in their application because they do not take into account rider flexibility, saddle flex, rider body proportions, leg length differences, muscle strength and pedaling technique. Nonetheless, a quick and easy method to attain a close to ideal seat height is to have your heel level or slightly lower (5mm or less) than the ball of your foot when you straighten your leg with the crank at its furthest extension and in line with the seat tube. Make sure your pelvis remains level and you are not over reaching for the pedal.
Saddle Fore / Aft: For comfortable long distance cycle training your saddle should be set back so that you can comfortably maintain a straight or slightly curved back. This will help maintain a stable pelvis during pedaling and encourage your gluteals to drive the pedals. With your pedal in the 3 o’clock position, your saddle fore /aft position is in the correct position when a plumb line hanging from just below your knee cap is 1-2 cm behind the pedal axle. The ideal fore /aft position will depend on your cycling needs as well as your flexibility and riding style.
Handlebar Height and Stem Length: Handlebar height and handlebar stem length should be set so that again you can comfortably maintain a straight to slightly curved back whilst at the same time remaining relaxed in your arms and neck.
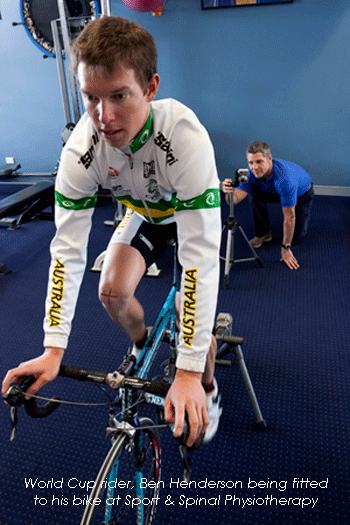
Professional Bike Fit Assessment: All quick and easy bike fit tips are rough guidelines only. If you are serious about your cycling and would like to improve performance and reduce cycling-related injuries then you should have a professional bike fit assessment at Sport & Spinal Physiotherapy. Our bike fit physiotherapist performs all of the above bike fit measurements and more, however each measurement is more accurate and in consideration of any biomechanical limitations, pedaling technique and your individual needs. It is important that any adjustments made to your bike geometry can be accommodated within your musculoskeletal abilities. We fit the bike to you as much as you to the bike.
All serious cyclists would benefit from a bike fit assessment to improve performance and reduce injuries
Top 10 Pedaling Pointers
- Don’t ride with too large a gearing as this places more load onto your kneecap joint potentially causing knee pain. Ideally, when riding with cleats you should pedal at least 90 rotations per minute (rpm) on flat roads, and no less than 70rpm on going up hills. If you are riding with non-cleat shoes such as running shoes, then your cadence should be at least 80rpm on flat roads and no less than 60rpm going up hills.
- If you are returning from injury, limit your riding to flat roads only for the first few weeks. Your physiotherapist from Sport & Spinal Physiotherapy can guide your return to cycling.
- Don’t do one legged pedaling exercises or focus on the upstroke as this encourages hip flexor overactivity, potentially leading to low back pain.
- Think of pulling back from 3 or 4 o’clock of the pedal stroke by using your hamstring muscles. A popular coaching technique is to imagine you are wiping mud off your shoes.
- Listen to the pedal stroke and try to get rid of any rhythmical thud, thud, thud at the top and bottom of the pedal stroke.
- Usually in cycling one leg is stronger than the other. Think of the down-stroke of the non-dominant leg as this leg will tend to be underutilised for power generation compared to the dominant leg.
- Feel the pedal stroke and try to smooth it out. There shouldn’t be a jolt between the left leg / right leg transition.
- Ideally you should have a flat or slightly arched back that is silent (not moving) during pedaling, allowing for an efficient transfer of energy from your driving muscles to the pedals.
- Concentrate on keeping your pelvis stable or motionless, with a constant relationship between the saddle and your contact point on the saddle. Try to imagine you have a noise pressure sensor on your saddle that goes off every time you move your pelvis about on the saddle whilst pedaling.
- When pedaling, the middle of your foot, knee and hip joint should all be in line. Ideally your knee will travel up and down in a close to straight line. Large lateral excursions of your knee during pedaling are more likely to result in knee pain.